Yesterday, I have completed the backup and restore scripts and run a 2nd test uninstalling programs from an again newly restored EeePC Linux 900. This time, after I installed some extra programs (for test purpose only to put something into sda2), I only uninstalled the factory installed openoffice.org packages from the read only partition (sda1) which are a total of 264 MB. And also since the original read-only partition sda1 is only 71% used, I ended up with much more free disk space than before (2 GB vs original 1.44 GB).
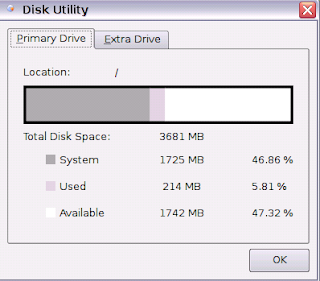
The actual partition layout before and after the changes are:
Disk /dev/sda: 4001 MB, 4001292288 bytesand
255 heads, 63 sectors/track, 486 cylinders
Units = cylinders of 16065 * 512 = 8225280 bytes
Device Boot Start End Blocks Id System
/dev/sda1 1 300 2409718+ 83 Linux
/dev/sda2 301 484 1477980 83 Linux
/dev/sda3 485 485 8032+ c Win95 FAT32 (LBA)
/dev/sda4 486 486 8032+ ef EFI (FAT-12/16/32)
Device Boot Start End Blocks Id Systemwith the read-only partition sda1 shrunk from original 300 cylinders (2.37 GB) to 220 cylinders (1.72 GB), and the read-write partition sda2 enlarged from original 184 cylinders to 264 cylinders.
/dev/sda1 1 220 1767118+ 83 Linux
/dev/sda2 221 484 2120580 83 Linux
In this blog today, I won't go into much details of how this works. You can refer to my previous blog Uninstall Program from the Read-only Partition - 1st test or HOWTO: Uninstall Programs from the Read-only Partition for more explanation of the process. I will focus on the steps to implement this and how to work with the scripts.
9 Steps in 3 Phases
- Phase A: Preparation - Prepare the slim_eee System Recovery USB disk
- Phase B: Uninstall Programs - Boot into read-write union filesystem and Uninstall Programs
- Phase C: Tidy Up - Boot up with the slim_eee Recovery USB disk to shrink and resize partitions
XXXXXXXXXXXXXXXXXXXXXXXXXXFor example, to backup the SYSTEM partition sda1, type the key [8] and press [Enter].
Select Menu for run tasks:
XXXXXXXXXXXXXXXXXXXXXXXXXX
"0" = Installing read-write boot initramfs image
"1" = Backup USER partition /dev/sda2 to image
"2" = Defrag and shrink SYSTEM partition /dev/sda1 to minimum
"3" = Grow USER partition /dev/sda2 to fill up free disk space
"4" = Restore USER partition /dev/sda2 from image
"5" = Grow filesystem in USER partition /dev/sda2 to fill up partition
"8" = Backup SYSTEM partition /dev/sda1 to image (Optional)
"9" = Restore SYSTEM partition /dev/sda1 from image (Optional)
"b" = Reboot System
"e" = Run extra scripts
"q" = Quit to shell prompt
Please select operation to run and press [Enter]:
Step A1 - Prepare an Asus EeePC System Recovery USB disk
This is simple. I won't go into details. You can refer to either:- Your EeePC User Manual. (For my 4G, it is described in the section Chapter 6 - System Recovery - Using USB Flash Ddisk)
- The wiki page: How to create an USB restore boot drive in EeeUser Wiki
- My previous blog: Create an Asus EeePC System Recovery USB disk
Step A2 - Modify the System Recovery USB disk with my slim_eee scripts
Download my script package slim_eee-0.1.tgz, extract it (right click on it in File Manager and select "Extract All...") and save the files to the root folder of the System Recovery USB disk. [NB. Better do it in your EeePC instead of a Windows desktop]Step B1 - Install the read-write boot initramfs image
I have built a read-write boot initramfs image initramfs-rw-eeepc.img and packed it together in the slim_eee-0.1.tgz package. This initramfs-rw-eeepc.img supports both unionfs (for 701 4G) and aufs (for 900 and later models).You need to install this to the folder /boot of the read-only partition sda1. Normally, this has to be done in rescue mode, but now you can just boot up from slim_eee System Recovery USB disk and select [0] from the task menu.
To boot from USB, press [ESC] at startup and select your USB disk as 1st boot device at the BIOS screen similiar to this:

Step B2 - Boot into read-write union filesystem and Uninstall Programs
After you have installed initramfs-rw-eeepc.img, you can proceed to boot into the read-write union filesystem to uninstall programs. For this, you need to access the hidden grub boot menu (the infamous F9 function) at bootup.There are more description to this in this wiki: F9_restore (explain), but what I use to do is to press [ESC], then just [Enter] at the BIOS "Select Boot Device" menu, immediately followed by [F9].
You will find a new entry "Boot Read-Write Union Filesystem" there, which is what you should select. Then you will be booted into the normal X windows desktop environment.
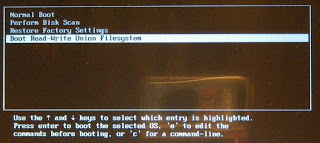
Everything will look the same except that sda1 is no longer read only (which can only be verified by entering the "mount" command in a terminal). Now when you uninstall programs that reside in sda1, the files will be deleted instead of the normal whited-out only but still sitting there eating up your precious disk space.
For this test, I have uninstalled openoffice with apt-get in a terminal as below:
/home/user> sudo apt-get remove --purge openoffice*[NB. Please note that the behaviour of the read-write union filesystem is that if you upgrade a program with files originally residing in sda1, the old files will be deleted from sda1 and the new files will be written to sda2. This is effectively moving the files from the read-only sda1 to sda2. The same applies if you force re-install a factory installed program.
Reading package lists... Done
Building dependency tree... Done
Note, selecting openoffice.org2-math for regex 'openoffice*'
...
The following packages will be REMOVED:
dictionaries-common* myspell-en-us* openoffice.org* openoffice.org-base*
openoffice.org-calc* openoffice.org-common* openoffice.org-core* openoffice.org-draw*
openoffice.org-help-en-us* openoffice.org-impress* openoffice.org-java-common*
openoffice.org-kde* openoffice.org-l10n-zh-tw* openoffice.org-math*
openoffice.org-thesaurus-en-us* openoffice.org-writer* python-uno*
0 upgraded, 0 newly installed, 17 to remove and 10 not upgraded.
Need to get 0B of archives.
After unpacking 264MB disk space will be freed.
Do you want to continue [Y/n]?
If you want to keep the F9 restore function, it is better not to upgrade packages that contain system libraries required for bootup, or otherwise you won't be able to boot up after your F9 restore.]
Step C1 - Backup the USER partition sda2
Now that we have uninstalled programs from the read-only partition sda1, to be able to make use this free disk space, we need to shrink down sda1 and enlarge sda2.As currently resize2fs cannot resize a partition changing its beginning sector, we can only backup all files in sda2, do the changes, then restore the files. So the 1st step in Phase C is to backup the USER partition sda2 - Select [1] from the task menu.
You will be prompted to insert additional USB drives if you want, then choose the drive to save the image to. The saved image will be named "eeepc-sda2.img.gz". Do not change this as the restore script will be looking for this same name.


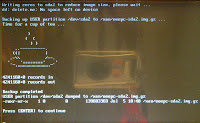
Beware of error messages. If you are not sure, better do it over again.
Step C2 - Defrag and Shrink the SYSTEM partition sda1
After backup is completed, you can proceed to defrag and shrink sda1 - select [2] from task menu. It will take long time (something around 15 - 20 minutes). There is no user interaction required.


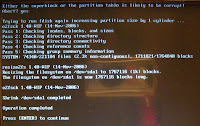
Defrag is just by moving files from sda1 to sda2 and back. You will need at least 300 MB free disk space in sda2 for this, or else the script will ask if you want to delete all files in sda2. So make sure you perform step C1 before doing this.
After defrag is completed, the script will calculate required disk size and resize sda1 to minimum required size + 5%. This will normally result in 96-97% used in the final sda1, and new free disk space in between sda1 and sda2.
Step C3 - Grow USER partition sda2 to fill up free disk space
Now we grow sda2 to reclaim the free disk space - Select [3] at the task menu.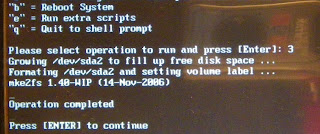
This is effectively by deleting the original sda2 partition with fdisk and re-create it out of all the available free disk space, then format and label it.
Step C4 - Restore USER partition sda2
By selecting [4] at the task menu, the restore script will look for the file "eeepc-sda2.img.gz" in the position where you have previously saved it. If not found, it will then search all mounted filesystem for this file.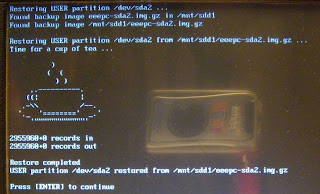
Step C5 - Grow filesystem in USER partition sda2 to fill up new partition
This last step is required because the backup image of sda2 is of the size of the previous partition which is smaller. So even after you have restored from the image, the partition is not fully utilized by the filesystem. This can be easily corrected by resize2fs - Select [5] at the task menu.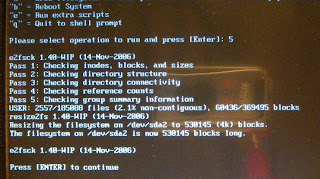
In this example screenshot, the filesystem has been corrected from 369495 blocks to 530145 (4k) blocks, i.e. from 1.44 GB to about 2 GB.
Additional scripts (Optional)
1) I have also written the scripts to backup and restore the SYSTEM partition sda1 which are optional to this process. If you want to play safe, you can also backup the SYSTEM partition sda1. The scripts are actually just copied from the backup and restore scripts for sda2, but replacing every sda2 with sda1 and /mnt-user with /mnt-system.2) There is also an extra script for adding a "rescue console" to the grub boot menu.
Concluding Remark
So, as easy as this, Linux EeePC users should be able to remove factory installed programs from the read-only partition sda1. And from now on, the union filesystem should no longer be a hindrance to add/remove softwares in the EeePC.In this hack, the major breakthrough is the script to defrag and resize the partition sda1 which I have been working on for more than 1 month already since I started my Restore from USB to minimal EeePC Linux project and have so far done numerous test and proved working.
I have also looked into the possibility of moving packages from sda2 to sda1, i.e. to make changes permanent. With the read-write union filesystem, this should also be possible working in this way:
- Boot into read-write union filesystem and force re-install a program you have previously upgraded. [NB. You can skip this step if the newly installed program has nothing to do with files in the read-only partition.] This step is for to remove those .wh.xxxxx white-out files previously written to sda2 by the union filesystem to mark files in sda1 as "deleted".
- Then boot from the slim_eee System Recovery USB disk.
- Extract a list of files for packages to be moved with the "dpkg -L [package]" command.
- Copy all files listed (probably with tar) to an USB disk, delete the original in sda2.
- Then backup all files in sda2. [NB. Do not use dd as the partition sda2 may become smaller when you restore.]
- Check free disk space available in sda1, enlarge partition and resize filesystem if necessary.
- Now copy all files saved for the packages to sda1.
- Shrink sda1 to minimum.
- Recreate sda2, format it and restore all files from backup.
No comments:
Post a Comment