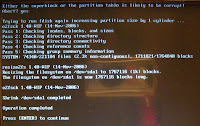
Sunday, November 15, 2009

Fixing network connection problem of win2k in my EeePC

Last weekend, after I completed the installation of win2k, I found that I can not connect to the Internet. This is kind of strange because the same EeePC, with the same LAN cable, can connect to my router with automatic settings. I checked in Device Manager that the LAN card driver was properly installed and win2k is reporting that it is running without problem.

This weekend, my sister came to visit me and I asked her to help troubleshooting on this. We checked all possibilities, setting IP address manually, but in vain. At last, when I looked into the "Properties" of the "Atheros L2 Fast Ethernet 10/100 Base-T Controller", I noticed something.

This is the first time I came across such wierd issue with win2k, but what I did for remedy is to uncheck the box "Allow the computer to turn off this device to save power" in the "Power Management" tab of the LAN card properties, and then Internet Explorer can connect immediately to www.google.com.

Besides this, I also noticed a minor issue using USB mouse. The system response is very slow when I plug in an USB mouse. At first, I thought it is problem with the left button of my mouse, but the problem persist after changing the mouse. Then I found that even the touchpad and the touchscreen have the same problem. But when I disconnect the USB mouse, everything resume normal.

I remember that other forum members on the EeeUser Forum who did installed win2k did not install the Asus touchpad driver, so I am thinking there may be incompatibility of the touchpad driver with USB mouse. I will check on this next weekend.

What I will also work on next weekend is to install the webcam driver. Asus does not provide webcam driver for win2k, but some people have worked this out for EeePC 701 4G as reported in in this thread of the EeeUser Forum and this webpage (in Chinese BIG5) of MindFarm.com. Although I don't expect to use the webcam often, this is just to make the installation complete.

Saturday, November 14, 2009

Install Java SDK6 to my EeePC

Recently I have bought a PDA phone HTC Hero which is running the Google Android platform 1.5. Although this system is Linux based, I found that there is no root access and is lacking some basic commands to hack the system in a teminal. After googling for a day, I found that I need to install the Android SDK to flash and downgrade the ROM to get root access. And one of the system requirements to install Android SDK is to have Sun Java JDK6 installed.

Installation of JDK6 has been discussed in length in this thread of the EeeUser Forum and as suggested by SublimePorte in post 65, I have worked out a much easier way to install from Debian package rather than compiling from source downloaded from Sun.

1) Add Debian "etch-backports" to your repositories source list

Open a terminal and edit /etc/apt/sources.list as root:
/home/user> sudo bash
eeepc-albkwan:/home/user> kwrite /etc/apt/sources.list &
Add this new entry for Debian "etch-backports" repositories:
deb http://www.backports.org/debian/ etch-backports main contrib non-free
Now update apt cache:
apt-get update
2) Now install sun-java6-jdk either with apt-get or its frontend synaptic. Here I did it in a terminal with the command apt-get:
eeepc-albkwan:/home/user> apt-get install sun-java6-jdk
Reading package lists... Done
Building dependency tree... Done
The following extra packages will be installed:
sun-java6-bin sun-java6-jre
Suggested packages:
binfmt-support sun-java6-demo sun-java6-doc sun-java6-source sun-java6-plugin
ia32-sun-java6-plugin sun-java6-fonts ttf-baekmuk ttf-unfonts ttf-unfonts-core
ttf-kochi-gothic ttf-sazanami-gothic ttf-kochi-mincho ttf-sazanami-mincho ttf-arphic-uming
Recommended packages:
libnss-mdns gsfonts-x11
The following NEW packages will be installed:
sun-java6-bin sun-java6-jdk sun-java6-jre
0 upgraded, 3 newly installed, 0 to remove and 85 not upgraded.
Need to get 51.0MB of archives.
After unpacking 152MB of additional disk space will be used.
Do you want to continue [Y/n]?
After installation has finished, you can verify if it is successful by checking current java version:
eeepc-albkwan:/home/user> java -version
java version "1.6.0_07"
Java(TM) SE Runtime Environment (build 1.6.0_07-b06)
Java HotSpot(TM) Client VM (build 10.0-b23, mixed mode, sharing)

With the unlimited Internet access through 3G and GPRS of my mobile phone network, I would like to set up WiFi or USB tethering of my EeePC to my HTC Hero to gain Internet access for my EeePC on the road. This is possible with the android-wifi-tether package, but the pre-requisite is to have "root" access.

On the other hand, while I am travelling aboard, it would also be good to have Ad hoc WiFi network from my EeePC as Wireless AP to my mobile phone (i.e. the reverse way) so as to save roaming charges. Of course, provided that the hotel have broadband Internet access (by LAN cable). This will also require "root" access. This something I need to work out next.

Sunday, November 8, 2009

Install win2k in my EeePC 4G

After waiting for more than 2 years, finally I got win2k installed to my EeePC 4G this weekend.

This has been a long story. Since I bought my EeePC 4G in Oct 2007, I have been thinking about dual boot Windows and Linux in my EeePC. But due to the limitation of disk space with the 4GB SSD, the idea was to boot either one of them from USB.

Initially, I wanted to boot win2k from USB because I expect to use Linux more often. But after studying the possibility, I finally turned to working on Booting Xandros from USB, because chances are that Linux can more probably be customized. Indeed, after working with other forum members of the EeeUser Forum, we worked out a solution to Boot Xandros from USB. And then I further worked out the hack to mount a SDHC as the USER partition of the union filesystem of the EeePC, so I could spare the 2nd partition of the SSD (/dev/sda2) for win2k. It was then I have purchased this copy of Windows 2000 Professional.

I wanted to install Windows on my EeePC because I own quite a number of commerical music softwares that are Windows only, and I wanted to make use of my EeePC as a portable music workstation. In fact, this was also the reason why I have purchased a copy of winxp for my desktop after having abandoned Windows for so many years. But after working some time with my EeePC 4G, I realized that the CPU and hardware is just not powerful enough to make any decent music. So I didn't bother to install win2k anymore.

Recently, after having installed the 16 GB 2nd SSD from my brother, there is now plenty of disk space in my EeePC and so I am tempted to work on this again. And so this Sunday, I spent the afternoon doing this.


With an USB CDROM and the win2k install CD which I have prepared 2 years ago slipstreamed with SP4 as per instructions here: Making a Bootable Windows 2000 CD with Service Pack Integrated, installation is straightforward though very slow. It took me more than 2 hours to complete the installation. The reason is probably because of USB 1.1 support only in the BIOS.

I didn't encounter the BSOD problem for ar5211.sys (wifi card driver) as mentioned by forum member sloppiE in this thread, probably because I have turned off WiFi in default Xandros. And as per his instructions, after Windows installation was completed, I installed the drivers from the Asus Support DVD running the setup.exe in each of the folders in the DVD:

\Drivers\Acpi\
\Drivers\Audio\driver\
\Drivers\Chipset\
\Drivers\Wireless\install_cd\
\Software\Lanutility\

I also installed the EGalax touchscreen Windows driver from its install CD, and then I extracted the Silicone Wave bluetooth wireless driver from win2k.zip I have downloaded to get my bluetooth tongle working under win2k.


Now that win2k installation was completed, I need to get my Linux back in dual boot. I choose grub as the default bootloader. So I need to put grub stage0 back to the MBR of the SSD. To do this, I booted up to the copy of default Xandros in my 1st SSD. [Note: I have set 2nd SSD as 1st boot device in BIOS, and have installed win2k and my working copy of default Xandros in the 2nd SSD. The copy of default Xandros in the 1st SSD is for experiments only.]

In default Xandros, I open a terminal as root to run grub:
asus-2134610915:/home/user> grub
Probing devices to guess BIOS drives. This may take a long time.
Then in the grub shell, I enter these commands to install grub to the MBR of my 2nd SSD:
       [ Minimal BASH-like line editing is supported.   For
the first word, TAB lists possible command
completions. Anywhere else TAB lists the possible
completions of a device/filename. ]

grub> find /boot/grub/stage1
(hd0,0)
(hd1,1)

grub> root (hd1,1)

grub> setup (hd1)
Checking if "/boot/grub/stage1" exists... yes
Checking if "/boot/grub/stage2" exists... yes
Checking if "/boot/grub/e2fs_stage1_5" exists... yes
Running "embed /boot/grub/e2fs_stage1_5 (hd1)"... 15 sectors are embedded.
succeeded
Running "install /boot/grub/stage1 (hd1) (hd1)1+15 p (hd1,1)/boot/grub/stage2 /boot/grub/menu.
lst"... succeeded
Done.

grub> quit
A bit explanation here:
(hd1) is my 2nd SSD (/dev/sdb), and (hd1,0) is the 1st partition in my 2nd SSD (/dev/sdb1) where I have installed win2k; (hd1,1) is the 2nd partition in my 2nd SSD (/dev/sdb2) where I have installed my working copy of default Xandros.

Now, on reboot, the system will boot up to default Xandros. And to get win2k to dual boot, I also need to edit the grub boot menu to add an entry for win2k. You can do it now or after you have rebooted into default Xandros. Basically, you need to edit the file /boot/grub/menu.lst. Here is the entry I have added (at the end of the file) for win2k:
title Win2k
rootnoverify (hd0,0)
makeactive
chainloader +1
Please be aware that if you still have union filesystem in your default Xandros, you need to edit the copy of menu.lst in the SYSTEM partition (i.e. sda1) instead of in sda2. In my case, I have already removed union filesystem, so just the one in sdb2.


There are a few settings you need to change to get win2k running smoothly which is covered in the section "Optimizing Windows XP" of the EeePC 701 User Guide.

But even after all that, win2k is terribly slow compared with default Xandros. So I don't think I will use it very often unless absolutely necessary.

Sunday, October 18, 2009

Install a 2nd SSD to my EeePC 4G

After waiting for almost 3 months, I have finally received the 16 GB Asus Phison SSD my brother had promised to send me (together with a 1GB DDRII RAM). These are the remains after my brother had upgraded the 16 GB SSD of his 901 to a 64 GB Patriot SSD, and RAM to 2 GB.

I have been reading in the EeeUser Forum that default Xandros of EeePC 4G is not compatible with a 2nd SSD. But out of my surprise, I just plug it in and it runs - no hardware modification required. The 1st SSD (4GB SiliconMotion SM223AC) remains the IDE master, and the new 16 GB Phison SSD becomes the IDE slave.


So apparently, there are different software and hardware versions of EeePC 4G, some that needs the FLASH_CON pin 26 modification for to insert a 2nd SSD, while the earliest models (like the one I bought) don't need this.

For your information, my 4G was bought on the 1st day EeePC started to be sold in Hong Kong. Its serial number is:
701-W0004
MB REV 701
S/N: 7A0AAQ008175
VN: 7569

Now that I have a 16 GB 2nd SSD, I can use it as permanent home for default Xandros - because for some months already, I have my working copy of default Xandros in SD card (boot from USB), while the 1st SSD is retained for experiments. Also, I have been thinking for long time to install also win2k in my EeePC (this is the reason why initially I worked on booting Xandros from USB).

So my new 16 GB 2nd SSD will be the home of win2k, default Xandros, and the HOME partition. And to do this, I booted with Pupeee and run GParted to repartition the 2nd SSD, then dd the working default Xandros partition (no union filesystem) from the SD card to the 2nd SSD.
dd if=/dev/sda1 of=/dev/hdd2 conv=notrunc,noerror,sync bs=4k
Please note that when I booted from Pupeee, the system sees the 2nd SSD as /dev/hdd, and the SD card as /dev/sda.

Then I need to change the volume label of /dev/hdd2, and also edit /boot/grub/menu.lst to specify the correct root partition and the volume label (because I am using an custom initramfs image that mounts the root partition by seeking volume label). This time, I chose "XANDROS" as the volume label of this root partition.
e2label /dev/hdd2 XANDROS
But before this system can boot, I still need to install grub to the MBR of the 2nd SSD. Then I can set in BIOS the 2nd SSD as 1st boot device. And for this, I open a terminal and run the grub command:
sudo bash
grub
Then, in the grub shell, I run these commands:
grub> find /boot/grub/stage1
grub> root (hd1,1)
grub> setup (hd1)
Now I have my working copy of default Xandros up and running.

Edit fastinit to avoid mounting 2nd SSD as home partition

Currently, I have EeePC Linux version 901 on the 1st SSD and this version will automatically mount any Linux partition with the volume label HOME as /home. Of course, this is not desirable because I don't want my experiments to mess up my working copy of default Xandros. So I disable this in the boot script /sbin/fastinit.

To do this, you can either hexedit /sbin/fastinit (with khexedit) to remove the line "/bin/mount -onoatime -L HOME /home > /dev/null" [NB. Replace with equal number of blanks], or simply run this sed command in a root terminal:
sudo bash
sed -i 's@/bin/mount -onoatime -L HOME /home > /dev/null 2>&1@ @' /sbin/fastinit
So after almost five months of living in SD, my default Xandros finally find a permanent home in the new 16 GB SSD.

Monday, July 27, 2009

Fix File Manager problem after Asus update

Many people have complained about this problem that after applying the printer update from Asus, File Manager will close automatically when you right click a file or directory to view its properties.

I have also experienced this problem on the EeePC Linux I have installed to my desktop since I updated it from 701 4G to version 1.6. I have not paid much attention to it before but due to certain practical need, I need to get this fixed tonight.

After some checking, I have located the problem to be due to undefined symbol in /usr/lib/libpropdlg.so.3:
XandrosFileManager: symbol lookup error: /usr/lib/libpropdlg.so.3: undefined symbol: _Z13SqueezeStringPKcj
Further tracking this down, this library is symbolically linked to the library /usr/lib/libpropdlg.so.3.0.0 and is part of the package xandros-libpropdlg which is further updated by "Asus Update" after I upgraded to version 1.6:
/home/user> dpkg -S /usr/lib/libpropdlg.so.3.0.0
xandros-libpropdlg: /usr/lib/libpropdlg.so.3.0.0
The installed version is found to be 4.0.492-1:
/home/user> dpkg -l xandros-libpropdlg
Desired=Unknown/Install/Remove/Purge/Hold
| Status=Not/Installed/Config-files/Unpacked/Failed-config/Half-installed
|/ Err?=(none)/Hold/Reinst-required/X=both-problems (Status,Err: uppercase=bad)
||/ Name Version Description
+++-=========================-=========================-======================================
ii xandros-libpropdlg 4.0.492-1 Xandros PROPDLG Library
By force downgrading this package to version 4.0.398-2 with synaptic, I have managed to get this problem fixed.

Below are screenshots of how I do this in synaptic:


Monday, July 13, 2009

Upgrade my EeePC to Openoffice 3.1

From time to time, I will receive emails with *.docx attachment which is only supported by openoffice3 but not the openoffice 2.x that comes pre-installed in EeePC. So there is the need for me to upgrade to openoffice3.

Upgrading to openoffice.org3 requires an extra 381MB disk space because by nature of the union filesystem, files of the factory installed version are in the read-only partition sda1 and thus cannot be removed unless you have removed union filesystem or uninstall openoffice from the read-only partition as what I have previously done. Then you can save 264~299 MB depending on your model.

The following steps are gathered from the information in this wiki: Upgrading OpenOffice.org from 2.0 to 2.3.1 and from this and this threads by kgha in the EeeUser Forum.

STEPS

1) Download the latest openoffice of your required localized version for "Linux DEB" platform from http://download.openoffice.org/other.html, save it to "My Home".

2) Extract the archive and navigate into the "DEB" folder of extracted folder tree. Then open a terminal:

Alternatively, you can press [Ctrl]-[Alt]-[T] to open a terminal and then change directory into the "DEB" folder:
cd OOO310_m11_native_packed-4_en-US.9399/
cd DEBS/
[NB. Please note that the 1st folder name will be different with different OOo and localized language version.]

3) Install the deb packages in the "DEB" folder according to this sequence:
sudo dpkg -i ooobasis*.deb
sudo dpkg -i openoffice*.deb

4) There will be some error messages that the packages are left unconfigured due to dependency problem:

I corrected this by:
sudo dpkg --configure -a
5) Also, if you have enabled Advanced desktop, you will also need to install the openoffice.org Debian menu package in the folder "desktop-integration" to have openoffice3 programs menu show up automatically in the KDE start menu:
cd desktop-integration/
sudo dpkg -i openoffice*.deb
This will also take care of "File Associations" in "File Manager".

6) Finally, if you are using the Easy Mode simple desktop, you will need to update the tabbed icons for the new OOo version program shortcuts by editing simpleui.rc:
sudo kwrite /opt/xandros/share/AsusLauncher/simpleui.rc
Please note that depending on your model, the old OOo program shortcuts (in /usr/share/applications/) may be:
ooo-writer.desktop
ooo-calc.desktop
ooo-impress.desktop
ooo-draw.desktop
ooo-math.desktop
OR
/opt/xandros/bin/ooo-impress-ar.sh
/opt/xandros/bin/ooo-calc-ar.sh
/opt/xandros/bin/ooo-writer-ar.sh
/opt/xandros/bin/ooo-math-ar.sh
/opt/xandros/bin/ooo-draw-ar.sh
And the new program shortcuts installed by openoffice3 are:
openoffice.org3-base.desktop
openoffice.org3-calc.desktop
openoffice.org3-draw.desktop
openoffice.org3-impress.desktop
openoffice.org3-math.desktop
openoffice.org3-printeradmin.desktop
openoffice.org3-startcenter.desktop
openoffice.org3-writer.desktop
So what you'll need to do is to search for "ooo" in your simpleui.rc and replace it by the corresponding new program shortcut, e.g. search and replace "ooo-writer.desktop" by "openoffice.org3-writer.desktop".

Then, on reboot, you should be able to run openoffice3 from the usual Easy mode desktop icons in the "Work" tab and open *.docx files.

Saturday, July 4, 2009

9 Steps to Uninstall Programs from the Read-only Partition

(Cont'd from Uninstall Program from the Read-only Partition - 1st test)

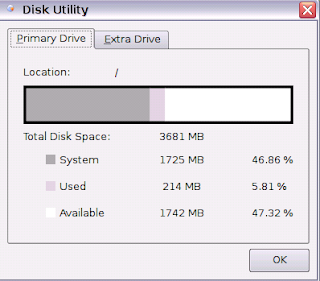
Yesterday, I have completed the backup and restore scripts and run a 2nd test uninstalling programs from an again newly restored EeePC Linux 900. This time, after I installed some extra programs (for test purpose only to put something into sda2), I only uninstalled the factory installed openoffice.org packages from the read only partition (sda1) which are a total of 264 MB. And also since the original read-only partition sda1 is only 71% used, I ended up with much more free disk space than before (2 GB vs original 1.44 GB).

The actual partition layout before and after the changes are:
Disk /dev/sda: 4001 MB, 4001292288 bytes
255 heads, 63 sectors/track, 486 cylinders
Units = cylinders of 16065 * 512 = 8225280 bytes

Device Boot Start End Blocks Id System
/dev/sda1 1 300 2409718+ 83 Linux
/dev/sda2 301 484 1477980 83 Linux
/dev/sda3 485 485 8032+ c Win95 FAT32 (LBA)
/dev/sda4 486 486 8032+ ef EFI (FAT-12/16/32)
and
  Device Boot    Start       End    Blocks   Id  System
/dev/sda1 1 220 1767118+ 83 Linux
/dev/sda2 221 484 2120580 83 Linux
with the read-only partition sda1 shrunk from original 300 cylinders (2.37 GB) to 220 cylinders (1.72 GB), and the read-write partition sda2 enlarged from original 184 cylinders to 264 cylinders.

In this blog today, I won't go into much details of how this works. You can refer to my previous blog Uninstall Program from the Read-only Partition - 1st test or HOWTO: Uninstall Programs from the Read-only Partition for more explanation of the process. I will focus on the steps to implement this and how to work with the scripts.

9 Steps in 3 Phases

Most of the steps have been automated with my scripts. You can simply enter your choice from the task menu:
XXXXXXXXXXXXXXXXXXXXXXXXXX
Select Menu for run tasks:
XXXXXXXXXXXXXXXXXXXXXXXXXX

"0" = Installing read-write boot initramfs image
"1" = Backup USER partition /dev/sda2 to image
"2" = Defrag and shrink SYSTEM partition /dev/sda1 to minimum
"3" = Grow USER partition /dev/sda2 to fill up free disk space
"4" = Restore USER partition /dev/sda2 from image
"5" = Grow filesystem in USER partition /dev/sda2 to fill up partition

"8" = Backup SYSTEM partition /dev/sda1 to image (Optional)
"9" = Restore SYSTEM partition /dev/sda1 from image (Optional)

"b" = Reboot System
"e" = Run extra scripts
"q" = Quit to shell prompt

Please select operation to run and press [Enter]:
For example, to backup the SYSTEM partition sda1, type the key [8] and press [Enter].

Step A1 - Prepare an Asus EeePC System Recovery USB disk

This is simple. I won't go into details. You can refer to either:

Step A2 - Modify the System Recovery USB disk with my slim_eee scripts

Download my script package slim_eee-0.1.tgz, extract it (right click on it in File Manager and select "Extract All...") and save the files to the root folder of the System Recovery USB disk. [NB. Better do it in your EeePC instead of a Windows desktop]

Step B1 - Install the read-write boot initramfs image

I have built a read-write boot initramfs image initramfs-rw-eeepc.img and packed it together in the slim_eee-0.1.tgz package. This initramfs-rw-eeepc.img supports both unionfs (for 701 4G) and aufs (for 900 and later models).

You need to install this to the folder /boot of the read-only partition sda1. Normally, this has to be done in rescue mode, but now you can just boot up from slim_eee System Recovery USB disk and select [0] from the task menu.

To boot from USB, press [ESC] at startup and select your USB disk as 1st boot device at the BIOS screen similiar to this:


Step B2 - Boot into read-write union filesystem and Uninstall Programs

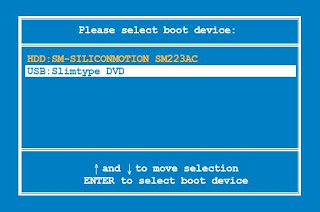
After you have installed initramfs-rw-eeepc.img, you can proceed to boot into the 
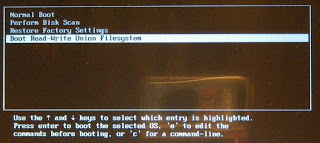
read-write union filesystem to uninstall programs. For this, you need to access the hidden grub boot menu (the infamous F9 function) at bootup.

There are more description to this in this wiki: F9_restore (explain), but what I use to do is to press [ESC], then just [Enter] at the BIOS "Select Boot Device" menu, immediately followed by [F9].

You will find a new entry "Boot Read-Write Union Filesystem" there, which is what you should select. Then you will be booted into the normal X windows desktop environment.


Everything will look the same except that sda1 is no longer read only (which can only be verified by entering the "mount" command in a terminal). Now when you uninstall programs that reside in sda1, the files will be deleted instead of the normal whited-out only but still sitting there eating up your precious disk space.

For this test, I have uninstalled openoffice with apt-get in a terminal as below:
/home/user> sudo apt-get remove --purge openoffice*
Reading package lists... Done
Building dependency tree... Done
Note, selecting openoffice.org2-math for regex 'openoffice*'
...

The following packages will be REMOVED:
dictionaries-common* myspell-en-us* openoffice.org* openoffice.org-base*
openoffice.org-calc* openoffice.org-common* openoffice.org-core* openoffice.org-draw*
openoffice.org-help-en-us* openoffice.org-impress* openoffice.org-java-common*
openoffice.org-kde* openoffice.org-l10n-zh-tw* openoffice.org-math*
openoffice.org-thesaurus-en-us* openoffice.org-writer* python-uno*
0 upgraded, 0 newly installed, 17 to remove and 10 not upgraded.
Need to get 0B of archives.
After unpacking 264MB disk space will be freed.
Do you want to continue [Y/n]?
[NB. Please note that the behaviour of the read-write union filesystem is that if you upgrade a program with files originally residing in sda1, the old files will be deleted from sda1 and the new files will be written to sda2. This is effectively moving the files from the read-only sda1 to sda2. The same applies if you force re-install a factory installed program.

If you want to keep the F9 restore function, it is better not to upgrade packages that contain system libraries required for bootup, or otherwise you won't be able to boot up after your F9 restore.]

Step C1 - Backup the USER partition sda2

Now that we have uninstalled programs from the read-only partition sda1, to be able to make use this free disk space, we need to shrink down sda1 and enlarge sda2.

As currently 
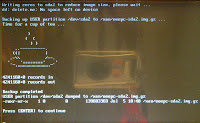
resize2fs cannot resize a partition changing its beginning sector, we can only backup all files in sda2, do the changes, then restore the files. So the 1st step in Phase C is to backup the USER partition sda2 - Select [1] from the task menu.

You will be prompted to insert additional USB drives if you want, then choose the drive to save the image to. The saved image will be named "eeepc-sda2.img.gz". Do not change this as the restore script will be looking for this same name.

Beware of error messages. If you are not sure, better do it over again.

Step C2 - Defrag and Shrink the SYSTEM partition sda1

After backup is completed, you can proceed to defrag and shrink sda1 - select [2] from task menu. It will take long time (something around 15 - 20 minutes). There is no user interaction required.

Defrag is just by moving files from sda1 to sda2 and back. You will need at least 300 MB free disk space in sda2 for this, or else the script will ask if you want to delete all files in sda2. So make sure you perform step C1 before doing this.

After defrag is completed, the script will calculate required disk size and resize sda1 to minimum required size + 5%. This will normally result in 96-97% used in the final sda1, and new free disk space in between sda1 and sda2.

Step C3 - Grow USER partition sda2 to fill up free disk space

Now we grow sda2 to reclaim the free disk space - Select [3] at the task menu.

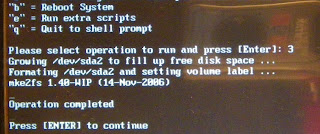
This is effectively by deleting the original sda2 partition with fdisk and re-create it out of all the available free disk space, then format and label it.

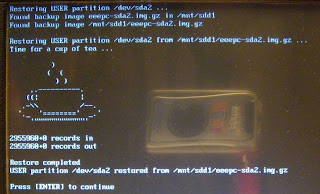
Step C4 - Restore USER partition sda2

By selecting [4] at the task menu, the restore script will look for the file "eeepc-sda2.img.gz" in the position where you have previously saved it. If not found, it will then search all mounted filesystem for this file.


Step C5 - Grow filesystem in USER partition sda2 to fill up new partition

This last step is required because the backup image of sda2 is of the size of the previous partition which is smaller. So even after you have restored from the image, the partition is not fully utilized by the filesystem. This can be easily corrected by resize2fs - Select [5] at the task menu.

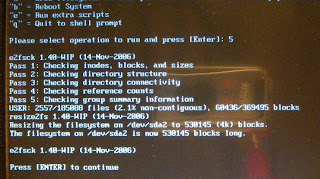
In this example screenshot, the filesystem has been corrected from 369495 blocks to 530145 (4k) blocks, i.e. from 1.44 GB to about 2 GB.

Additional scripts (Optional)

1) I have also written the scripts to backup and restore the SYSTEM partition sda1 which are optional to this process. If you want to play safe, you can also backup the SYSTEM partition sda1. The scripts are actually just copied from the backup and restore scripts for sda2, but replacing every sda2 with sda1 and /mnt-user with /mnt-system.

2) There is also an extra script for adding a "rescue console" to the grub boot menu.

Concluding Remark

So, as easy as this, Linux EeePC users should be able to remove factory installed programs from the read-only partition sda1. And from now on, the union filesystem should no longer be a hindrance to add/remove softwares in the EeePC.

In this hack, the major breakthrough is the script to defrag and resize the partition sda1 which I have been working on for more than 1 month already since I started my Restore from USB to minimal EeePC Linux project and have so far done numerous test and proved working.

I have also looked into the possibility of moving packages from sda2 to sda1, i.e. to make changes permanent. With the read-write union filesystem, this should also be possible working in this way:
  1. Boot into read-write union filesystem and force re-install a program you have previously upgraded. [NB. You can skip this step if the newly installed program has nothing to do with files in the read-only partition.] This step is for to remove those .wh.xxxxx white-out files previously written to sda2 by the union filesystem to mark files in sda1 as "deleted".
  2. Then boot from the slim_eee System Recovery USB disk.
  3. Extract a list of files for packages to be moved with the "dpkg -L [package]" command.
  4. Copy all files listed (probably with tar) to an USB disk, delete the original in sda2.
  5. Then backup all files in sda2. [NB. Do not use dd as the partition sda2 may become smaller when you restore.]
  6. Check free disk space available in sda1, enlarge partition and resize filesystem if necessary.
  7. Now copy all files saved for the packages to sda1.
  8. Shrink sda1 to minimum.
  9. Recreate sda2, format it and restore all files from backup.
So far, I have been working only with factory installed softwares. With the different EeePC Linux Recovery iso(s) I have on-hand, I can simulate most situations. But coming to user installed or upgraded packages, there will be unlimited possibilities and I don't think I can work on this alone. So I am going to start this discussion in EeeUser Forum and invite others to join this project.

Friday, July 3, 2009

Uninstall Program from the Read-only Partition - 1st test

Yesterday, I have started my 1st (and successful) test run of uninstalling programs from the read-only partition of EeePC Linux as a continuation of my Restore from USB to minimal EeePC Linux approach.

I have done this test with a 900 iso restored from USB. For testing purpose, I upgraded a few programs with "Add/Remove Software" so as to create something in the USER partition (sda2). Then I proceeded to modify the script package from my Restore from USB to minimal EeePC Linux approach, breaking down the main script into scripts for installing the read-write initramfs image, defrag and shrink down sda1, and grow sda2 to fill up free space resulted, together with another script offering a task menu for the user to easily run the scripts:
XXXXXXXXXXXXXXXXXXXXXXXXXX
Select Menu for run tasks:
XXXXXXXXXXXXXXXXXXXXXXXXXX

"0" = Installing read-write boot initramfs image
"1" = Backup USER partition /dev/sda2 to image sda2.img.gz
"2" = Defrag and shrink SYSTEM partition /dev/sda1 to minimum
"3" = Grow USER partition /dev/sda2 to fill up free disk space
"4" = Restore USER partition /dev/sda2 from image sda2.img.gz
"5" = Grow filesystem in USER partition /dev/sda2 to fill up partition
"b" = Reboot System
"e" = Run extra scripts
"q" = Quit to shell prompt

Please select operation to run and press [Enter]:
I have not yet worked out the scripts [1] and [4] for backup and restore sda2. Originally I intended to use the tar and gzip command to backup all files, but was not successful because I couldn't figure out what options the tar command in busybox environment supports. So I ended up doing this semi-automatically with the backup and restore process done manually with the dd and gzip command.

Once again, except for "Part II: Uninstall programs under read-write union filesystem", all the other steps were done booting up from a custom Asus EeePC System Recovery USB disk which I have modified with support of e2fsprogs commands including e2fsck, e2label, mke2fs, resize2fs, tune2fs, and also additional commands like tar, gzip.

Part I: Install read-write boot initramfs image

I have written a simple script "rw_initramfs.sh" for easy installation of the read-write boot initramfs image initramfs-rw-eeepc.img into the read-only partition sda1 booting up from USB, just choose [0] at the task menu and press [Enter].

On reboot, I pressed [ESC] and then [Enter] at the 1st boot device selection menu, immediately followed by [F9] [NB. This offers a better chance to catch the 1 sec timing after the BIOS splash screen than pressing F9 repeatedly]. This led me to the hidden grub boot menu, where I selected the last entry: "Boot Read-Write Union Filesystem". to boot into a read-write union filesystem.

When the system got booted up, I verified this with the "mount" command. Here were mounted filesystems:
rootfs on / type rootfs (rw)
/dev/sda1 on / type ext2 (rw)
none on / type aufs (rw,xino=/.aufs.xino,br:/=rw:/=rw+nolwh)
proc on /proc type proc (rw)
sysfs on /sys type sysfs (rw)
devpts on /dev/pts type devpts (rw)
tmpfs on /dev/shm type tmpfs (rw)
tmpfs on /tmp type tmpfs (rw)
usbfs on /proc/bus/usb type usbfs (rw)
See / is mounted rw, and the union filesystem aufs is also rw for every branch.

Part II: Uninstall programs under read-write union filesystem

In this read-write union filesystem, the SYSTEM partition sda1 is not mounted read-only. So when you uninstall factory installed programs, instead of just whited-out (in sda2) as in default Xandros, it will be deleted from sda1. So if you have some factory installed programs you never use in your EeePC, you can uninstall them in this read-write union filesystem and reclaim some extra disk space.

In this test, I uninstalled all games, all educational programs, skype, pidgin which I seldom use. Once in a while, I will play a game, but it is easy enough to just re-install the particular game when I need it.

Be careful when you uninstall programs with either synaptic or apt-get, always carefully look at the "To be removed" list to make sure you do not accidentally remove some other important dependent packages.

I also upgraded firefox, and xlex. The behaviour of a read-write union filesystem is that if you upgraded a program, the old version files in sda1 will be deleted and the new version files will be installed to sda2. So effectively you are moving the package files from the read-only sda1 to the read-write sda2 if you upgrade a program. So you should not use this method to upgrade system libraries or you will lose the F9 restore function.

Eventually I will also work on moving packages from sda2 to sda1. This will probably involve booting up from USB and generating a list of files for the package to be moved with "dpkg -L [package]". Then according to this list, move the files from sda2 to sda1 (probably first into the USB disk because there may not be enough disk space in sda1). For the moment, let's stay with just removing factory installed programs.

After I was done uninstalling programs I don't need, I booted from USB again to reclaim the free disk space in sda1 then.

Part III: Shrink down the read-only partition and reclaim the free disk space

Step 1: Backup USER partition /dev/sda2 to image sda2.img.gz

As currently it is not possible to resize and move the beginning of a Linux partition, after we have shrunk down sda1, the only way to reclaim the free disk space is to delete partition sda2 and re-create it. So we need to backup files in sda2 first.

The ideal method is to use the tar and gzip command. The advantage of this over dd is speed, especially if you have a USER partition not so full. But since I can't get the busybox tar command working, I worked with the dd command this time.

The draw back of backing up with dd is that if you have a target partition smaller than the original, you may end up with errors restoring the image. However, if the target partition is bigger than the original, you can easily resize it to fit afterwards with the resize2fs command. So if we were to eventually work out a way to move packages from sda2 to sda1, we may come up with a situation where sda2 will become smaller. Then we would definitely need to backup with tar or other means instead of dd.

The dd Backup Process

Here are the commands and terminal output how I use
the dd command to backup the USER partition sda2. Before I dumped the drive image, I also mounted it and zeroed it so as to reduce the size of the gzipped image.
#mount /dev/sda2 /mnt-user
#cd /mnt-user
#dd if=/dev/zero of=delete.me bs=8M; rm delete.me
dd: delete.me: No space left on device

#cd /
#umount /dev/sda2
umount: Couldn't umount /dev/sda2: Inappropriate ioctl for device
#umount -l /dev/sda2
umount: forced umount of /dev/sda2 failed!
#umount -l /mnt-user
#mount /dev/sda2 /mnt-user
#umount /mnt-user

#dd if=/dev/sda2 | /sbin/gzip > /xan/sda2.img.gz
2955960+0 records in
2955960+0 records out
#
Please note that I had difficulty to umount it, and has tried to force umount it with the lazy umount option. It was successful only when I specified the mounting point instead of the device name in the force umount command.

As I am saving sda2.img.gz to the USB Recovery Disk, you will need enough free disk space there. Since the USER partition sda2 is normally of size 1.3 GB, you will probably need an USB Recovery disk of size 2 GB to play safe. This also means you would probably need to delete the P701L.gz Linux system image from the USB Recovery Disk.

Step 2: Defrag and shrink the SYSTEM partition sda1 to a minimum

I already have this script "shrink_ro.sh" done. It is basically part of the main script in my Restore from USB to minimal EeePC Linux approach, so it is well tested. So I just ran "taskmenu.sh" and select [2] from the task menu.
#sh /xan/taskmenu.sh
However, please note that the current script is defragmenting sda1 by moving files in groups of maximum 300 MB. So you need at least 300 MB disk space in sda2 to do this. If the script found less than 300 MB free disk space in sda2, it will ask if you want to delete all files in sda2 to make necessary space.

Step 3: Grow USER partition sda2 to fill up the free disk space


On completion of step 2, I have freed up something like 600 MBs. Actually part of this is the original 27% free disk space in the factory sda1. By selecting [3] in the task menu, the script "grow_user.sh" was run which run the fdisk command to delete existing partition sda2 and re-create it, filling up
available free disk space. Then format and label it.

Step 4:
Restore USER partition /dev/sda2 from image sda2.img.gz

Again, I have not yet worked out the script for this. I just enter [q] to quit to the shell prompt and enter these commands manually:
#cd /
#/sbin/gzip -dc /xan/sda2.img.gz | dd of=/dev/sda2
2955960+0 records in
2955960+0 records out
#/sbin/e2fsck -fy /dev/sda2
USER: clean, 2611/185088 files, 63833/369495 blocks
#/sbin/resize2fs /dev/sda2
#
Step 5: Grow filesystem in sda2 to fill up partition

Now that sda2 has been restored from the image, its filesystem however is still of the same size as the previous partition, and is smaller than the enlarged partition. So we need to run resize2fs to enlarge it.

The script for this has already been done. Just run taskmenu.sh again and select [5].

Now that everything was done, I rebooted into normal union filesystem to check the result.

Package installation and removal record can be read from /var/log/dpkg.log (as root only). I verified that all the changes had been properly noted.
sudo kwrite /var/log/dpkg.log 
I also fired up synaptic and verified the packages I have removed were gone, and tried to re-installed a few packages.

The available disk space as reported by "Disk Utility" is now 1.7G. So this approach is all over successful. What remains for me to do is to complete the 2 missing backup and restore scripts, then run another test probably uninstalling openoffice (because I will probably upgrade to openoffice3 which has no deb available for Debian etch yet). Then I will pack the scripts and upload to my server.

(To be cont'd: 9 Steps to Uninstall Programs from the Read-only Partition)

Wednesday, June 24, 2009

Conclusion: Restore from USB to minimal EeePC Linux system

(cont'd from: Part V: Yet another test with 1.6 French iso)

My Last Tests with 900 and 1000H iso

In the past 2 weeks, I have been testing out the different scenarios, including with the 1000H iso and 900 iso. Now, all known bugs have been fixed and all conditions tested and verified working.

I have also broken down the "extra.sh" script into separate scripts (extra*.sh) for each extra job. This would allow the user to easily delete scripts he don't need and add new scripts. Just like the "remove*.list" files, the main script will run the extra scripts one by one after removing programs according to the "remove*.list" you specified, and before resizing.

The 900 iso testing went very smooth, but the testing with the 1000H iso is particularly troublesome. I ran into all kinds of different errors, e.g. udev not working (cannot detect USB drives), asus-launcher not launching the Easy Mode desktop, power button not working ... Only after many many trials, I tracked this down to the extra scripts I have written trying to deactivate Asus update and install wireless and LAN drivers for my 4G as per Howto: Fix network problem using 1000H iso on a 4G. I didn't solve this problem - very strange. So in the end, I removed these 2 extra scripts. [EDIT 2009/6/29: I have finally worked this out and put these extra scripts back into my script package. Just a silly mistake: forget to give the scripts exec permission after editing them.]

I have also tested with different extra% and found that with 2% or 3% extra in one case and another, I have achieved 100% disk usage in sda1 after shrinking. With 1%, resize2fs (and e2fsck) will report failure. So I think the original 5% extra should be a safe and economical choice which will result in around 97% used.

So if you have an EeePC other than the 701 series, even if you are just uninstalling 1 or 2 packages, with this script, you will be able to squeeze some extra disk space (up to 300~500 MB depending on your model) because many models start with something like 87% (even 76%) used in sda1. [NB. If you don't uninstall anything, the script will NOT shrink the partition sda1.]

The time to do this ranges from 17 mins with a 701 4G iso to 25 mins with a 1000H iso, provided that you have a fast USB device. With a slow one, it may take longer to dump the Linux recovery image from the USB device which normally only takes 5 minutes.

Summary of Errors Encountered

1) Couldn't umount after removing staroffice from the 1000H iso (SOLVED)
Umount: Couldn't umount /mnt: Inappropriate ioctl for device
I don't quite understand this error which has troubled me for a few days. After carefully tracking it down, I found that this comes after uninstalling staroffice* (regardless of removal of other programs and has nothing to do with total file size removed).

Finally, I have been able to sort this out with a lazy umount (umount -l) and wait for 15 seconds immediately after uninstalling staroffice. So I have to add a series of umount and mount commands after each apt-get operation of package removal.

2) Couldn't move some symbolic links in sda1 (SOLVED)
Moving /usr/lib/[b-l] ...
mv: unable to rename '/mnt/usr/lib/libevent.so.1': No such file or directory
mv: unable to rename '/mnt/usr/lib/libgcj_bc.so.1': No such file or directory
mv: unable to rename '/mnt/usr/lib/liblber.so.2': No such file or directory
mv: unable to rename '/mnt/usr/lib/libldap.so.2': No such file or directory
mv: unable to rename '/mnt/usr/lib/libldap_r.so.2': No such file or directory
mv: unable to rename '/mnt/usr/lib/libvolume_id.so': No such file or directory
I had these errors moving symbolic links since the beginning. Although they do not seem to cause any problem, to play safe, I want to eliminate them. So I log the error messages and process them to extract the link name and link target filename, then delete the original symbolic links and re-create them.

I have also logged the "ls -l" output for all these links before and after the operation so that the user can check and verify afterwards. [NB. The timestamp for these files will become different after this operation.]

3) With the 701 4G iso, after restoring to minimal system, there is a hissing sound from the speaker as reported many times by others in EeeUser forum (both Linux and winxp). This will not affect music playing, and will go off if you mute the speakers. Since this occur to both Linux and winxp, I am inclined to think it is hardware related (perhaps BIOS?). I have not looked into this yet.

Overview of Script Operation

As an overview, here is what the script will do:
1) Delete all partitions in sda1. Then create one primary partition, and format it. [Note: This is for to correct any errors in the partition table and filesystem. The original script from Asus will fail in such cases.]
2) Dump the Linux system image to the 1st SSD (MBR and sda1).
3) Create the user partition (sda2) and other partitions, format and label them.
4) For those models with a 2nd SSD, create, format and label the HOME partition (sdb1).
5) Uninstall programs from the system partition (sda1) as per the remove*.list files.
6) Run extra jobs as per the extra*.sh scripts.
7) Defragment the filesystem in sda1 by moving files to sda2 and back.
8) Calculate available and used disk space, and shrink sda1, allowing 5% extra.
9) Reboot.

Steps of Procedure

1) Prepare an Asus EeePC USB Recovery Disk. Read your EeePC User Manual or my other blog: Create an Asus EeePC System Recovery USB disk.
[NB. You will need a 1 GB USB disk for the EeePC System Recovery USB disk working with the 701 and 900 iso, but 2 GB for the 1000H and version 1.6 iso.]


2) Download my script package restore-minimal-701-4G.tgz or restore-minimal-1.6-701-fr.tgz and extract the files to your System Recovery USB disk. [NB. Some people have reported problem extracting the files in Microsoft Windows with winzip and pkunzip.]

3) Edit the "remove*.list" files in the folder "removes/" according to the factory installed package list in your EeePC Linux version. You can run the command "dpkg -l" in a terminal to see what packages are currently installed. Be sure not to uninstall any system package or else you won't be able to boot.
[NB. Do not use Windows Notepad to edit the files. Use Notepad2 instead if you want to do it in Windows. The files should be saved with UNIX style "End of Line" instead of MSDOS text format.]

If you are using an EeePC Linux version I have tested, you can download and start from my "remove list" files:


ModelVersionLanguagesRemove File List
701 4G1.0.1en tw cnremove_files-701_4G.tgz
900 1.1.0.66en tw cn
remove_files-900.tgz
10001.6.0.104
en
remove_files-1000H.tgz
7001.6.1.5-a4enremove_files-701_en_US-1.6.1.5-a4.tgz
700 1.6.1.39fr en
remove_files-701_1.6_fr.tgz

4) Delete the extra*.sh scripts you don't need. Please note that there are different sets of extra*.sh scripts in restore-minimal-701-4G.tgz and restore-minimal-1.6-701-fr.tgz. Some extra scripts in the latter are only for 1.6 version, e.g. disable auto update. There are description of what each extra script does in the SUMMARY file in the extra/ folder.

5) Boot up from the USB Recovery disk - Press [ESC] at boot up and select the USB disk as 1st boot device, and let the script run.

You will be prompted during the process by apt-get to confirm removal of programs, and also for dumping the Linux system recovery image and shrinking sda1.

For details, please refer to my previous tests on this:
Part II: Success - Restoring my EeePC from USB to a Minimal System
Part IV: 2nd Test restoring to minimal with a 1.6.1 701 en iso
Part V: Yet another test with 1.6 French iso

Screenshots

1) Booting up and dumping the Linux recovery system image to sda1

2) Removing programs as per remove*.list

3) Defragment sda1 by moving files from sda1 to sda2 and back

4) Fixing mv problem with symbolic links

5) Final disk space in system and user partitions


What's Next?

While working on this restoring to minimal system, I have been thinking with the same method, it should also be possible to uninstall applications from the read only partition of the union filesystem (i.e. sda1).

The difference between the two approaches will be:
  1. No need to dump the Linux recovery image to sda1.
  2. Back up the user partition (i.e. sda2), if necessary. [NB. Since the read-only system partition sda1 can be easily restored from the Linux recovery image, I think there is no need to back it up.]
  3. Instead of uninstalling programs in the busybox chroot environment booting from USB, we should boot into a read-write union filesystem to implement the changes, so that dpkg and apt-get running under the union filesystem will be fully aware of the changes. [NB. In a read-write union filesystem, if you upgrade a package, old files in sda1 will be deleted and new files will always be written to sda2.]
  4. Need to back up all files in the user partition (i.e. sda2) to the USB device before shrinking sda1, and restoring them after operation completed.
So, it should not be possible to do this automatically with a script as in this restore to minimal approach. Instead, I think I need to split the main script into separate scripts including:
The user will need to boot into the read-write union filesystem and run synaptic to uninstall packages he don't need. And if he want to retain the F9 restore function, better not to upgrade packages that will upgrade system libraries, only uninstall programs he don't need and/or upgrade applications like openoffice that is not loaded at system boot up.

Also, the user will need to make sure there is enough free disk space in sda2 for upgrading some big packages, e.g. openoffice, because all new files will be written to sda2 before you can shrink sda1 to reclaim the free space from the old files deleted from sda1.

This also applies to force re-installing factory installed packages. The original files will be deleted from sda1 and write to sda2, so effectively moved from the read-only sda1 to the read-write sda2. So you can do whatever you like with it later.

This will be my next project.

Part I : My 1st Trial
Part II: Success - Restoring my EeePC from USB to a Minimal System
Part III: Re-installing Removed Packages to my minimal EeePC Linux 701 4G
Part IV: 2nd Test restoring to minimal with a 1.6.1 701 en iso
Part V: Yet another test with 1.6 French iso
Conclusion: Restore from USB to minimal system